Example: Integrating issue trackers
Examples are for illustration only: adopting them unchanged into your system will almost certainly fail!
Example: Integrating issue trackers
IT operations means dealing with a multitude of issues and incidents: misconfigurations need to be corrected, cyber defenses need to be established, to name just two. Depending on the severity of the issue an ISMS activity may be triggered to help avoid such occurrences in the future, or at least identify and mitigate an issue as quickly and as effectively as possible.
Establishing a seamless exchange of information between IT Operations and Information Security Organization is an essential step towards this goal.
TTS trax offers an easy-to-use interface to help you connect your issue tracker to the TTS trax CIP module and thus transfer data on relevant incidents from IT operations to TTS trax automatically.
In this example we use the issue tracking system YouTrack to illustrate the necessary steps – the basic principle can be applied to any comparable system, however.
Determining the transfer conditions
The conditions that determine which tickets are to be transferred to TTS trax may be freely adjusted according to your business requirements.
For our example we will assume that tickets with a severity of “High” require further processing in TTS trax, as they may potentially trigger measures in the ISMS.
Preparing YouTrack
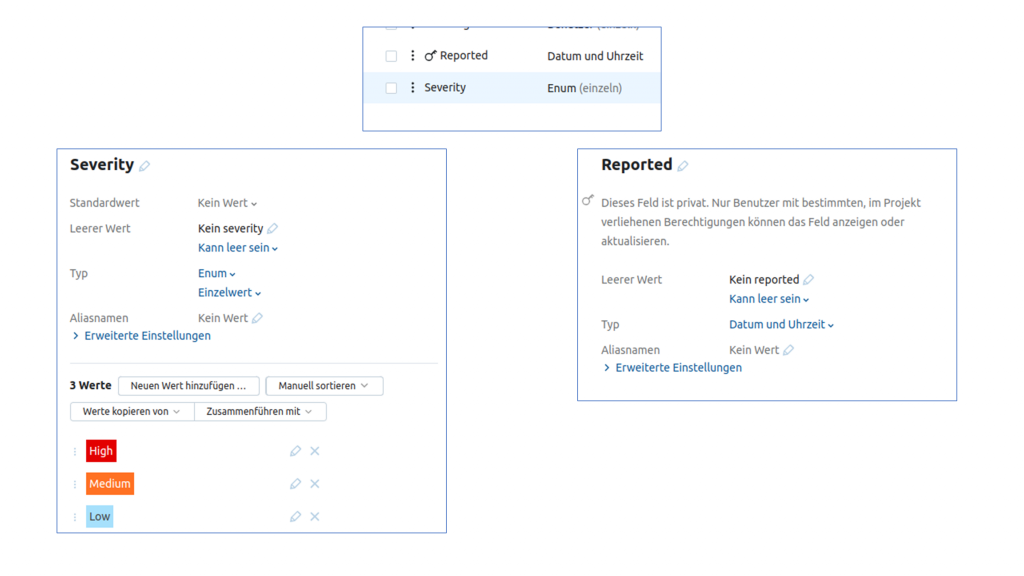
In addition to the *Severity* field, we add a new field *Reported* (field type “Date and Time”) where we record if and when an issue has already been transferred to TTS trax, to prevent issues from being sent multiple times.
Creating the postbox in TTS trax
In order to use the interface, a postbox needs to be created in TTS trax. An External Resource Definition (ERD) defines the fields that are captured via the API as well as a mapping to the entities needed to create a CIP issue in TTS trax. A graphical editor is available to facilitate this task.
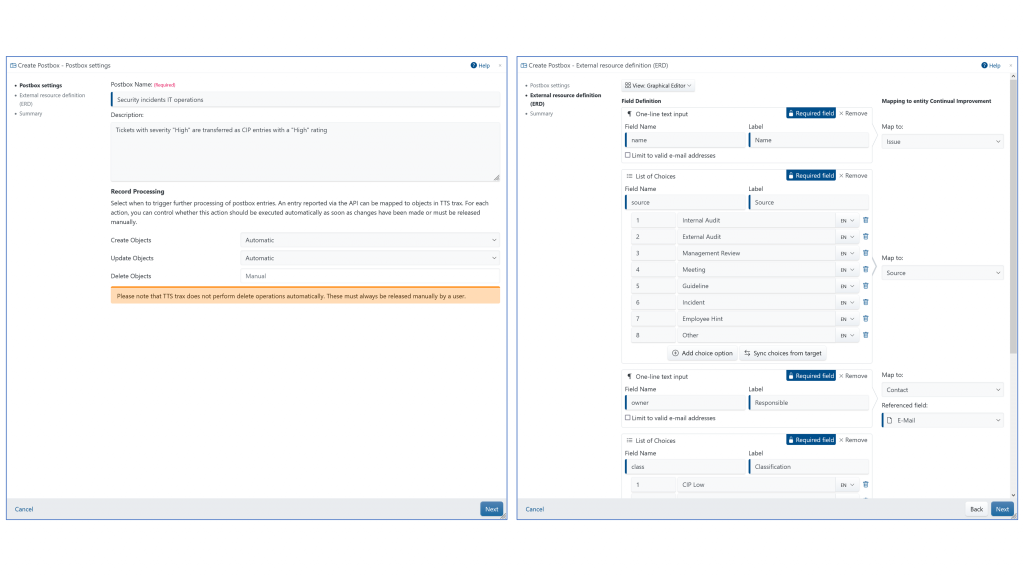
The open nature of the definition allows the transfer of any number of attributes via the interface that do not necessarily need to have an exact equivalent in TTS trax. Here, we add a field for the ticket URL that will allow the user to open the ticket directly from within trax:

The ERD from our example can be downloaded here [Link to ERD]
You may use the above External Resource Definition as template for your own project – a pre-existing ERD may be entered in the *Source View* of the ERD editor: Simply copy the code and paste it into the Source View of the ERD editor. Be sure, however, to adapt the example code to your system, or the integration will fail!
Defining a workflow in YouTrack
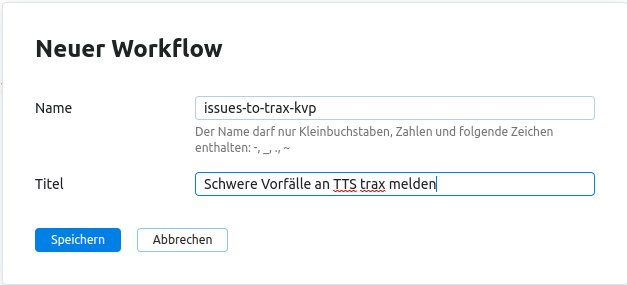
We use YouTrack’s workflow system to ensure that tickets with a certain severity (“High”) are transferred to TTS trax:
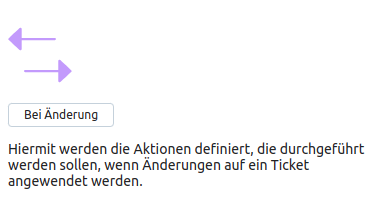
We define a rule here that is executed when the ticket is changed:
The following code can now be used to send the ticket to the new postbox in TTS trax:
					/**
 * Send issues with a high severity to TTS trax.
 * Before using this workflow, make sure to set up a postbox in TTS trax and generate an API token.
 */

const entities = require('@jetbrains/youtrack-scripting-api/entities');
const http = require('@jetbrains/youtrack-scripting-api/http');

const apiToken = '<API_TOKEN>';
const apiUrl = '<API_URL>';

exports.rule = entities.Issue.onChange({
  title: 'Create-issue-in-trax',
  guard: (ctx) => {
    // Only trigger this action, if the ticket has a high severity, is not a draft anymore and was not sent to TTS trax yet.
    return ctx.issue.fields.is(ctx.Severity, ctx.Severity.High) && !ctx.issue.fields.Reported && ctx.issue.isReported;
  },
  action: (ctx) => {
    const issue = ctx.issue;
    const id = issue.id;
    const attributes = {
      'name': issue.summary,
      'description': issue.description,
      'source': '6',
      'classification': '3',
      'contact': ctx.currentUser.email,
      'issue_url': issue.url
    };

    // Mark field as reported, so that we do not create a CIP issue more than once
    issue.fields.Reported = Date.now();

    // Send HTTP request to the TTS trax API
    const connection = new http.Connection(apiUrl, '', 10000);
    connection.addHeader('Content-Type', 'application/json');
    connection.addHeader('Accept', 'application/json');
    connection.addHeader('Authorization', 'Bearer ' + apiToken);

    const response = connection.postSync('', '', JSON.stringify({
      "data": [
        {
      		id: id,
      		attributes: attributes,
    	}
      ]
    }));

    if (!(response && response.isSuccess)) {
      console.log(response.toString());
    }
  },
  requirements: {
    Reported: {
      type: entities.Field.dateTimeType,
    },
    Severity: {
      type: entities.EnumField.fieldType,
      name: 'Severity',
      High: {},
      Medium: {},
      Low: {}
    }
  }
});
You will need to generate an API token for the postbox and note the URL for the “Create” endpoint. These need to be assigned as values for the variables apiToken and apiURL respectively.
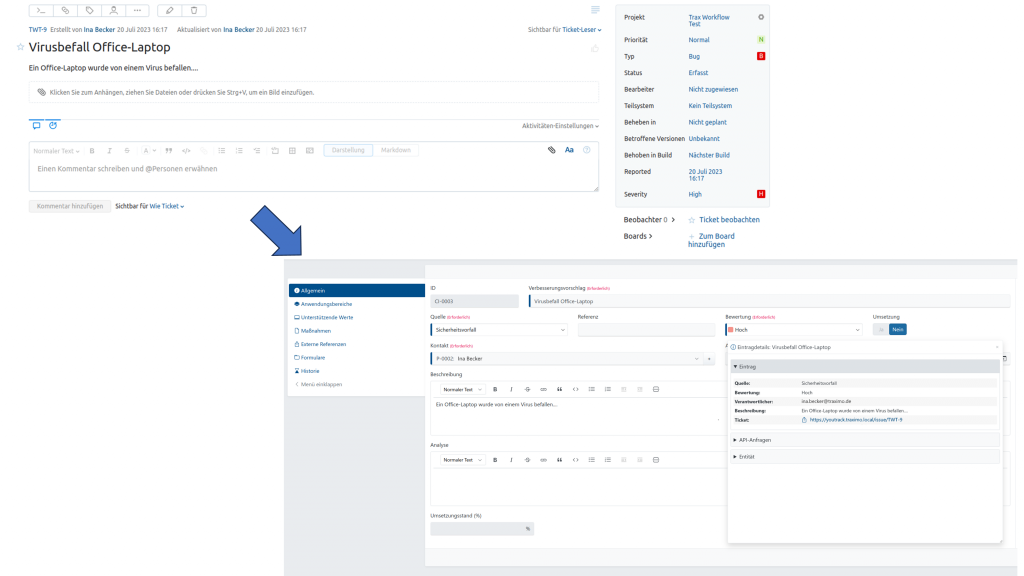
If a ticket receives a severity rating of “High” it is now automatically transferred into TTS trax:
Summary
Issues/Tickets with a severity rating of “High” are automatically recorded as CIP issues in TTS trax. The presented approach can of course be adapted to your needs: For example, you would use a manual trigger strategy if you prefer that objects in TTS trax will only be created after manual release.
You may also wish to transfer additional fields, such as collection date, transfer updates of certain ticket attributes, etc. The possibilities are numerous. Using postboxes, TTS trax offers you the option to connect any third party systems.
